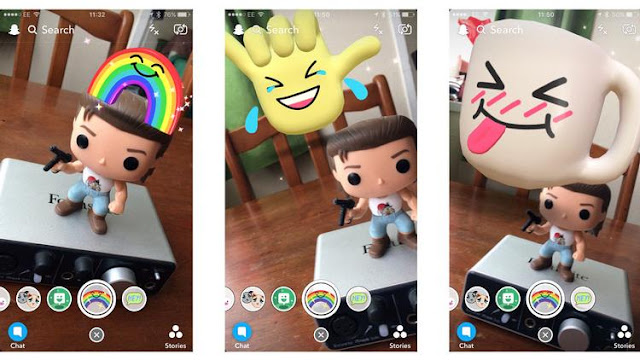
Snapchat has released new augmented reality lens which bring rainbows, clouds, and messages into your images. We show you how to use the new World Lenses in Snapchat.
Will be enough to pull out a lead in the Facebook Stories vs Snapchat battle? We take a look.
How do I check I've got the latest version of Snapchat?
To see the new lenses you’ll need the latest update of Snapchat on your phone.
iOS
iPhone users need to go to the Apple App store and tap on the Updates tab at the bottom of the screen. You’ll be presented with a list of the relevant apps that need updating, so select either Update All or choose individual apps instead.
Android
If Android is your platform of choice then open the Google Play Store, tap the three lines in the upper left corner, then select My Apps & Games>Updates.
You’ll see a list of all the apps on your phone that need updating. Tap Update All if you want to do them en masse, of just tap the Update button next to Snapchat if you want to keep things quick and simple.
Where are the the new World Lenses?
With Snapchat now up to date, open the app and make sure that the rear camera (non-selfie one) is selected. Tap the screen and a row of lenses will appear as normal to the right of the camera button.
How do I use the World Lenses?
To place the rainbow simply tap the desired area of the screen. It can be a bit fiddly, and we found that moving the camera back so you could see more of the surrounding area was the best way to execute this.
Once placed you can increase the size of the image by placing your finger on the rainbow and sliding it up or down. This will result in the image becoming, respectively, larger or smaller. Tapping on the image itself will also cycle you through the various other animations available.
To the right of the Rainbow lens you’ll see an icon with a speech bubble and Hey! inside. Tap this (or whatever the icon is now if Snapchat has changed it) and ornate text will appear on your display.
You position them just like before, and tap on the message to change it to a different one. The cool thing about both the text and animated images is that once you’ve placed them in your shot, moving the camera around doesn’t change where they are, but does alter the perspective of how you see them.
They essentially become 3D images, so if you move the camera closer then the images will get bigger, plus you can move around the image and shoot it from different angles.
This is interesting in stills, but the effect is far better in videos, so spend some time playing with them to see the possibilites open to your creative side.
There you go, a quick look at the new World Lenses in Snapchat. Be sure to check the app each day to see what wonders await, and maybe take a look at our complete guide on How to use Snapchat to make sure you’re getting the most out of this fun social media platform.


0 comments:
Post a Comment